---

layout: page_v2
title: Prebid-Rendered Mobile GAM Setup
description: Prebid-Rendered Mobile GAM Setup
sidebarType: 3

---

# AdOps Guide to setting up GAM for Prebid-Rendered Mobile
{: .no_toc}

- TOC
{:toc}

## Overview

This guide is for mobile app developers that have chosen to use the "Prebid-Rendered" integration approach for [iOS](/prebid-mobile/modules/rendering/ios-sdk-integration-gam.html) or [Android](/prebid-mobile/modules/rendering/android-sdk-integration-gam.html).

The orders and line items are the same as for other types of integration, but the creative setup
has a number of differences.

## Getting Started

See the [GAM with Prebid guide](/adops/step-by-step.html) for details on the Advertiser,
Orders, and Line Items. When you get to the creatives, come back here.

## Prepare the Prebid Creatives

{: .table .table-bordered .table-striped }
| Scenario | Type of Creative |
| --- | --- |
| Display Banner<br/>Video Banner<br/>Display Interstitial<br/>Video Interstitial | [3rd party HTML](#third-party-html) |
| Rewarded Video | [Special VastUrl](#rewarded-video) |

### Third Party HTML

For most ad formats, instead of using the Prebid Universal Creative, the Prebid SDK just needs to get a signal
from the Google Mobile Ad SDK that there's an ad ready to render. The Prebid SDK will
figure the rest of it out: rending the creative, handling the Open Measurement activities,
and for iOS, the SKAdnetwork calls.

Here's the body of the creative:

``` html
<script type="text/javascript" src="https://media.admob.com/api/v1/google_mobile_app_ads.js">
</script>
<script type="text/javascript">admob.events.dispatchAppEvent("PrebidAppEvent","%%PATTERN:bidid%%");</script>
```

TBD - what's `bidid`?

It will look something like this in GAM interface:
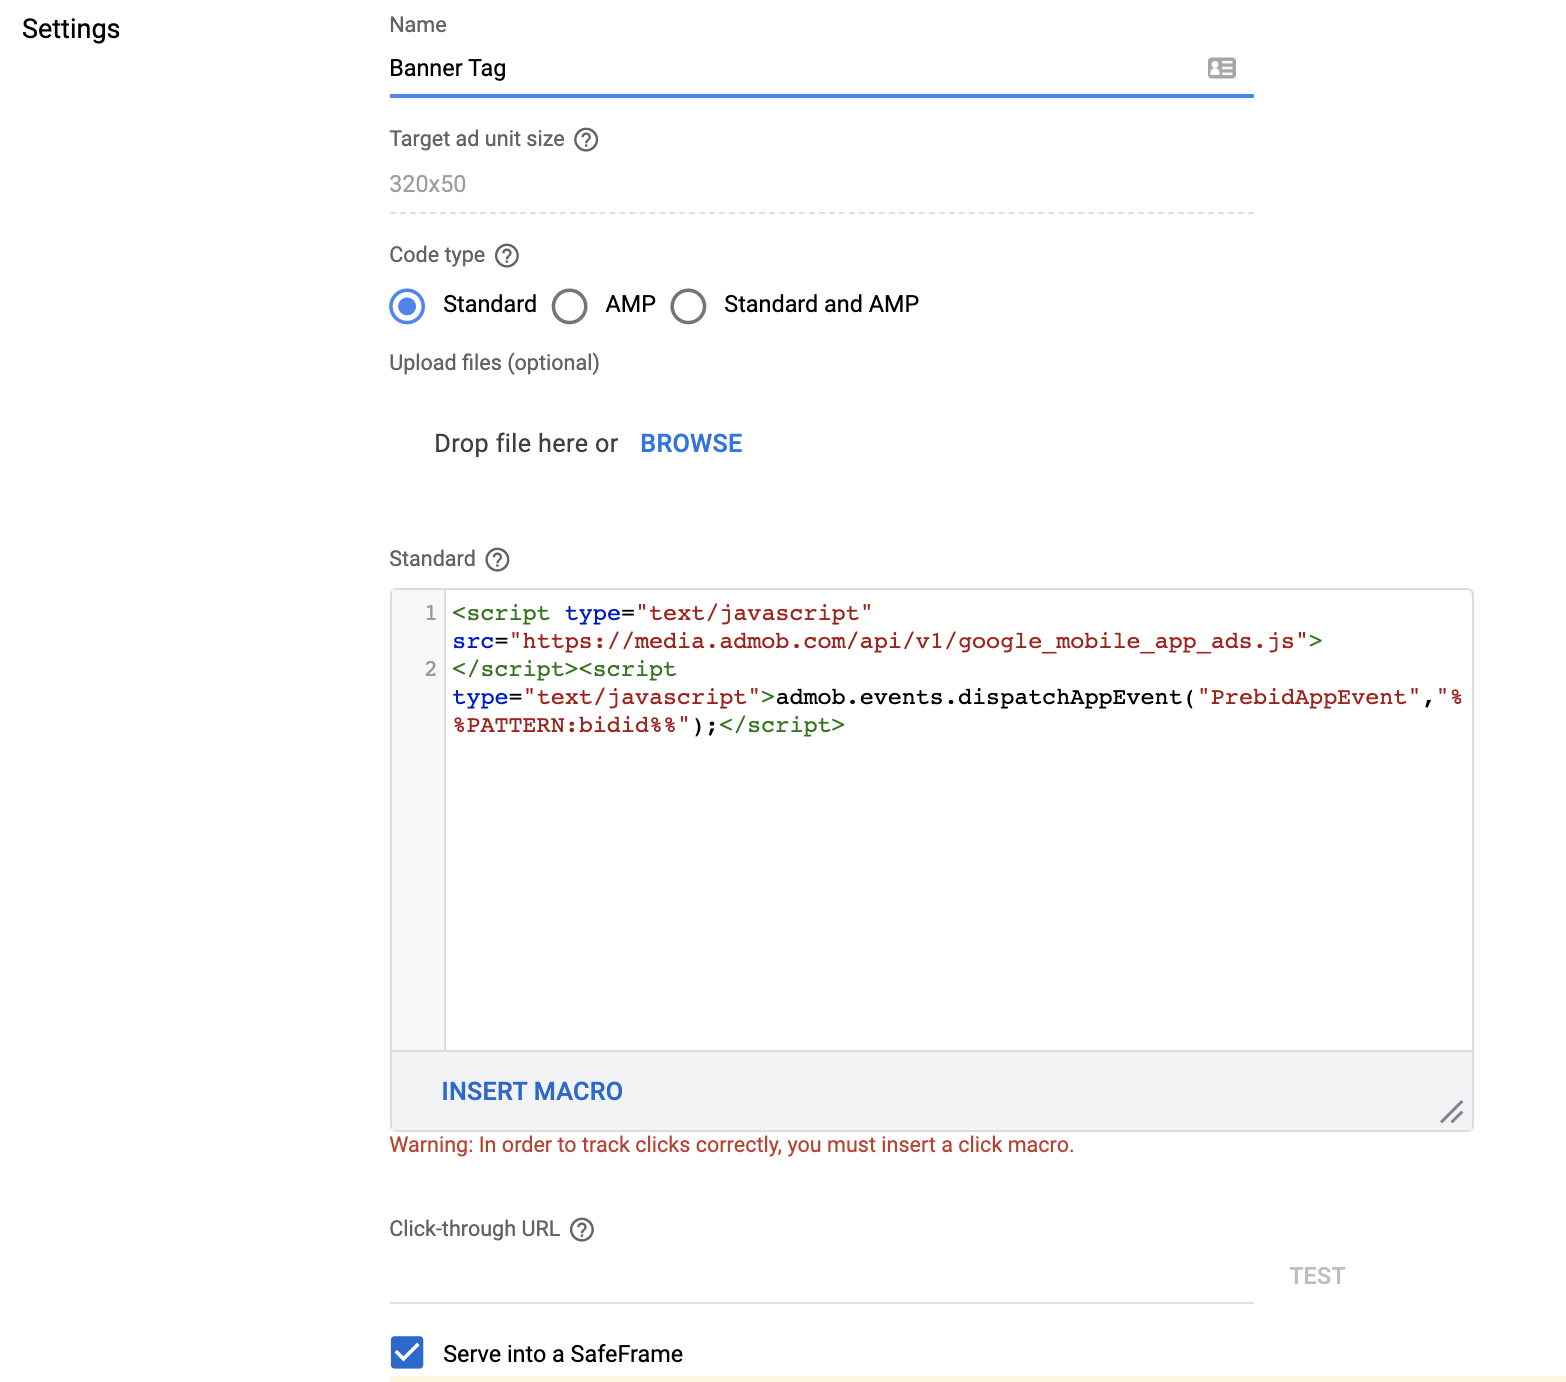
<img src="/assets/images/prebid-mobile/modules/rendering/order-gam-creative-banner.png" alt="Pipeline Screenshot" align="center">

{: .alert.alert-info :}
Developer background: The Prebid SDK integrates with the Google Moble Ads (GMA) SDK using the [App Events](https://developers.google.com/ad-manager/mobile-ads-sdk/android/banner#app_events) feature for most ad formats. The creative above contains a special tag that will be processed by Prebid SDK's GAM Event Handlers. When the handler receives the `PrebidAppEvent` event it will render the winning bid. Otherwise control will be passed to the GAM Ad View and the GMA SDK will render the received creative.

### Rewarded Video

Prebid rendering for Rewarded video ads is based on the [OnAdMetadataChangedListener](https://developers.google.com/android/reference/com/google/android/gms/ads/rewarded/OnAdMetadataChangedListener). So you need to set up a special VAST tag in the creative:

``` js
https://cdn.jsdelivr.net/npm/prebid-universal-creative/dist/prebid-mobile-rewarded-vast.xml
```

It will look something like this in the GAM interface:
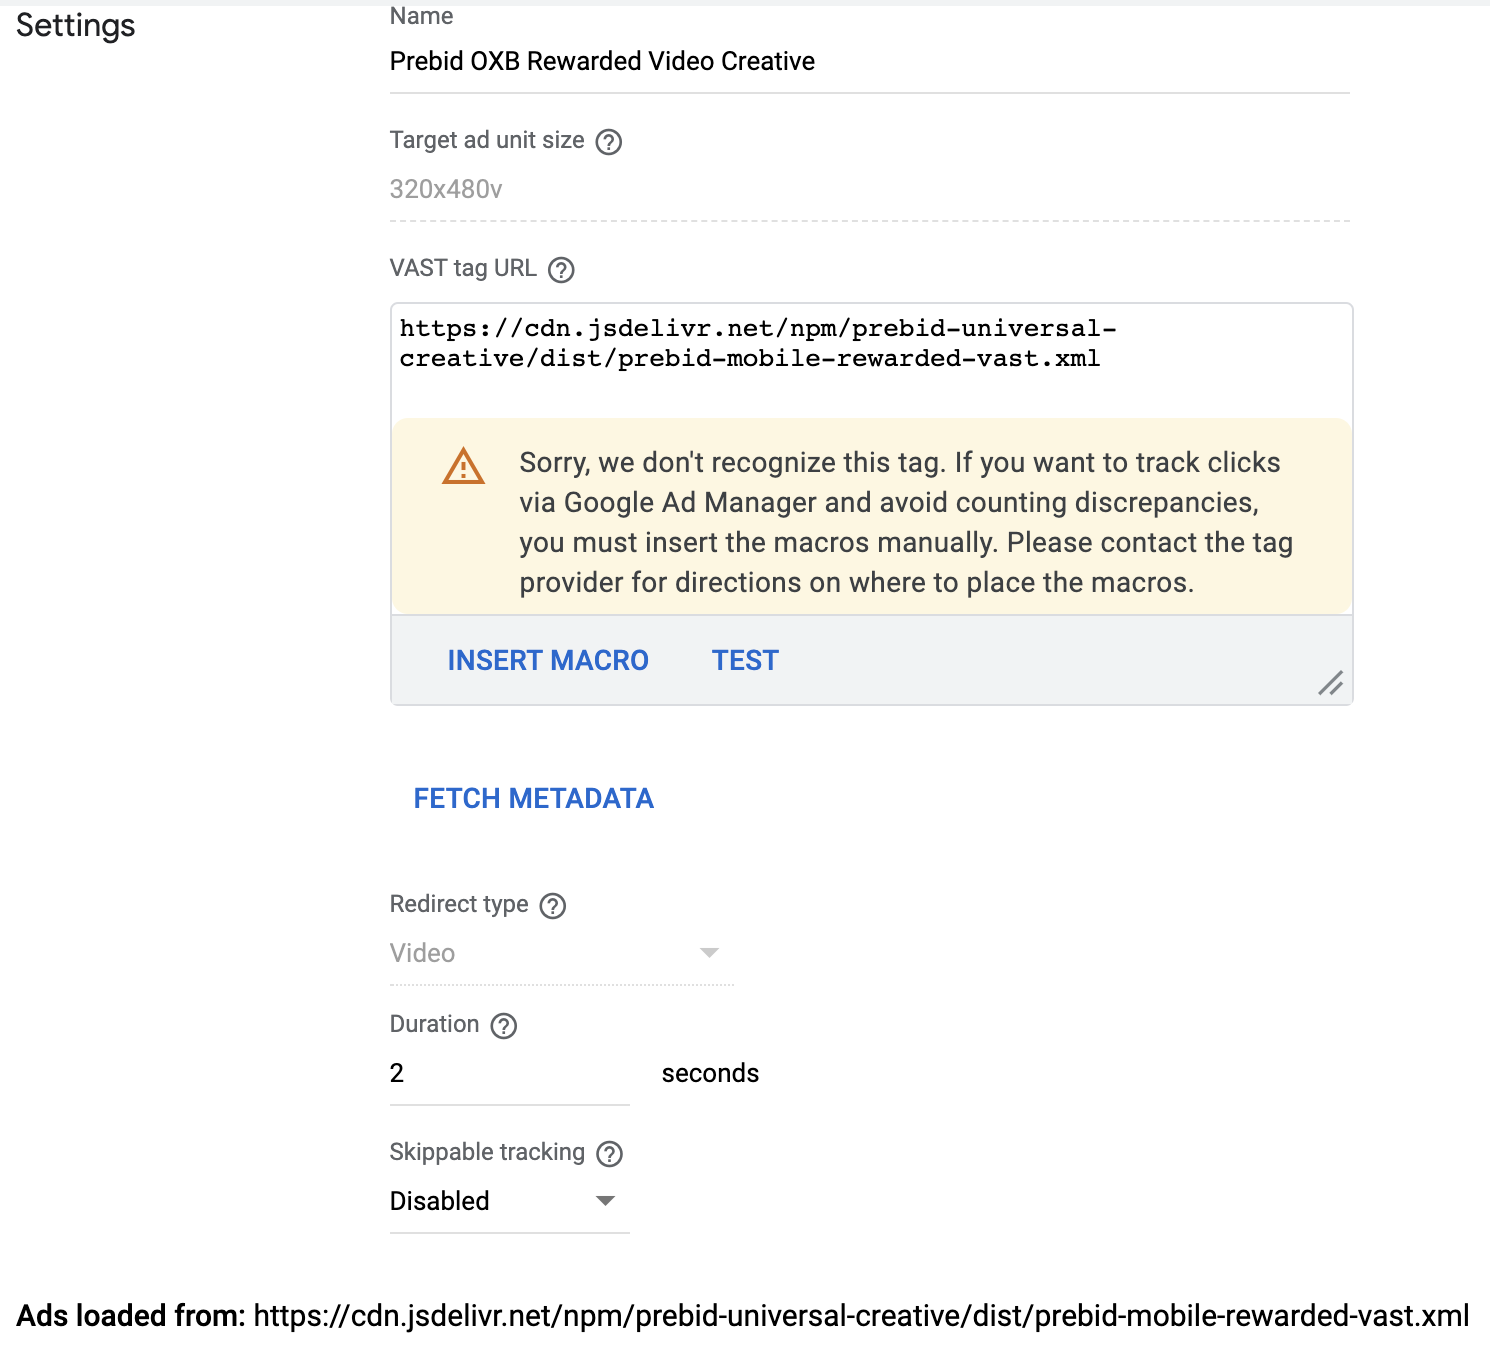
<img src="/assets/images/prebid-mobile/modules/rendering/order-gam-creative-rewarded.png" alt="Pipeline Screenshot" align="center">

If GAM Event Handler receives the tag's info it will render the winning bid. Otherwise the control will be passed to the GAM Ad View and it will render the received creative.

<!---

Native ads are not released yet.

### Native: Unified Ad

Click on **ADD CREATIVE** -> **New Creative** -> **Native Format** -> **Select Template...** and chose one of the predefined system templates.

Fill the template with any default values but put the **obligotary** value for the Body - **isPrebid**. This value will show Prebid SDK that it should  render the ad from the winning bid.

<img src="/assets/images/prebid-mobile/modules/rendering/order-gam-creative-unified-ad.png" alt="Create Native Ad Screenshot" align="center">

### Native: Custom Template

First need to create custom Native Format. For this go to **Delivery** -> **Native** -> **Create Native Ad** -> **Android & iOS app code**. At the page for the new ad format click on **ADD VARIABLE** and create a special text entry with name **isPrebid** and default value **1**.

<img src="/assets/images/prebid-mobile/modules/rendering/order-gam-creative-custom-template-format-variable.png" alt="Create Native Ad Screenshot" align="center">

This variable will show Prebid SDK that it should render the ad from the winning bid. The final custom format should look like this:

<img src="/assets/images/prebid-mobile/modules/rendering/order-gam-creative-custom-template-format.png" alt="Create Native Ad Screenshot" align="center">

Now need to create a Creative based on this Native Ad Format. Click on **ADD CREATIVE** -> **New Creative** -> **Native Format** -> **Select Template...** and choose the newly created format.

Fill all needed fields for the new creative and make sure that variable **isPrebid** is present in the form:

<img src="/assets/images/prebid-mobile/modules/rendering/order-gam-creative-custom-template.png" alt="Create Native Ad Screenshot" align="center">

### Native Styles

#### Step 1: Create a native ad

Go to `Google Ad Manager`, select `Delivery` > `Native`. Click `Create Native Ad`.

<img src="/assets/images/prebid-mobile/modules/rendering/order-gam-create-native-ad.png" alt="Create Native Ad Screenshot" align="center">

Select the `HTML & CSS editor` option.

<img src="/assets/images/prebid-mobile/modules/rendering/order-gam-ways-to-create-native-ad.png" alt="Ways to create Native Ad Screenshot" align="center">

#### Step 2: Define ad settings

For the Ad Size you can specify a specific size for the ad unit or specify the `fluid` size.

<img src="/assets/images/prebid-mobile/modules/rendering/order-gam-ad-settings.png" alt="Define Native Ad settings Screenshot" align="center">

#### Step 3: Style your native ad

You can add HTML and CSS to define your native ad template.

<img src="/assets/images/prebid-mobile/modules/rendering/order-gam-style-native-ad.png" alt="Style Native Ad Screenshot" align="center">

Example HTML:

``` html
<div class="sponsored-post">
  <div class="thumbnail">
<img src="hb_native_icon" alt="hb_native_icon" width="50" height="50"></div>
  <div class="content">
    <h1><p>hb_native_title</p></h1>
    <p>hb_native_body</p>
<a target="_blank" href="hb_native_linkurl" class="pb-click">hb_native_cta</a>
    <div class="attribution">hb_native_brand</div>
  </div>
<img src="hb_native_image" alt="hb_native_image" width="320" height="50">
</div>
<script src="https://cdn.jsdelivr.net/npm/prebid-universal-creative@latest/dist/native-trk.js"></script>
<script>
  let pbNativeTagData = {};
  pbNativeTagData.pubUrl = "%%PATTERN:url%%";
  pbNativeTagData.targetingMap = %%PATTERN:TARGETINGMAP%%;

  // if not DFP, use these params
  pbNativeTagData.adId = "%%PATTERN:hb_adid%%";
  pbNativeTagData.cacheHost = "%%PATTERN:hb_cache_host%%";
  pbNativeTagData.cachePath = "%%PATTERN:hb_cache_path%%";
  pbNativeTagData.uuid = "%%PATTERN:hb_cache_id%%";
  pbNativeTagData.env = "%%PATTERN:hb_env%%";
  pbNativeTagData.hbPb = "%%PATTERN:hb_pb%%";

  window.pbNativeTag.startTrackers(pbNativeTagData);
</script>
```

Example CSS:

``` css
.sponsored-post {
    background-color: #fffdeb;
    font-family: sans-serif;
}

.content {
    overflow: hidden;
}

.thumbnail {
    width: 50px;
    height: 50px;
    float: left;
    margin: 0 20px 10px 0;
    background-size: cover;
}

h1 {
    font-size: 18px;
    margin: 0;
}

a {
    color: #0086b3;
    text-decoration: none;
}

p {
    font-size: 16px;
    color: #000;
    margin: 10px 0 10px 0;
}

.attribution {
    color: #000;
    font-size: 9px;
    font-weight: bold;
    display: inline-block;
    letter-spacing: 2px;
    background-color: #ffd724;
    border-radius: 2px;
    padding: 4px;
}
```
-->

## Further Reading

- [GAM with Prebid guide](/adops/step-by-step.html)
